This guide assumes you’re using Ubuntu (in my case a VM running on Amazon EC2 as I’m on a Macbook).
1. Setup VM
If you already have a Ubuntu setup, you can skip this section.
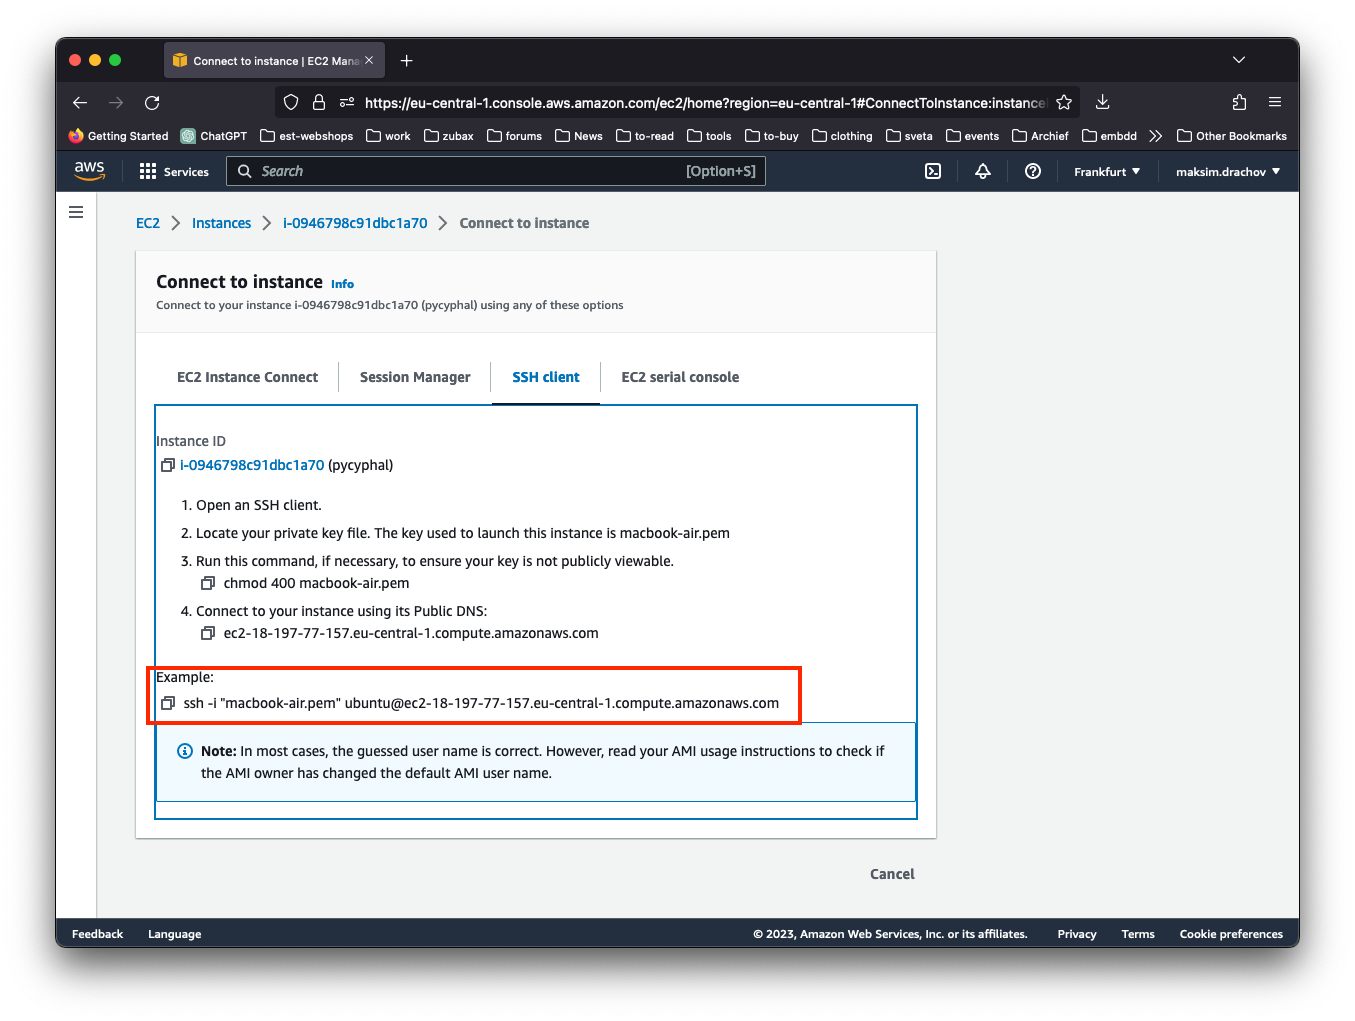
- Go to the EC2 Management Console
- Launch Instance, with the following settings:
- Name:
pycyphal-vm - OS:
Ubuntu - Instance type:
t2.large(defaultt2.microdoesn’t have enough RAM) - Key pair: Create new key pair and save.
- Other settings: default
- Name:
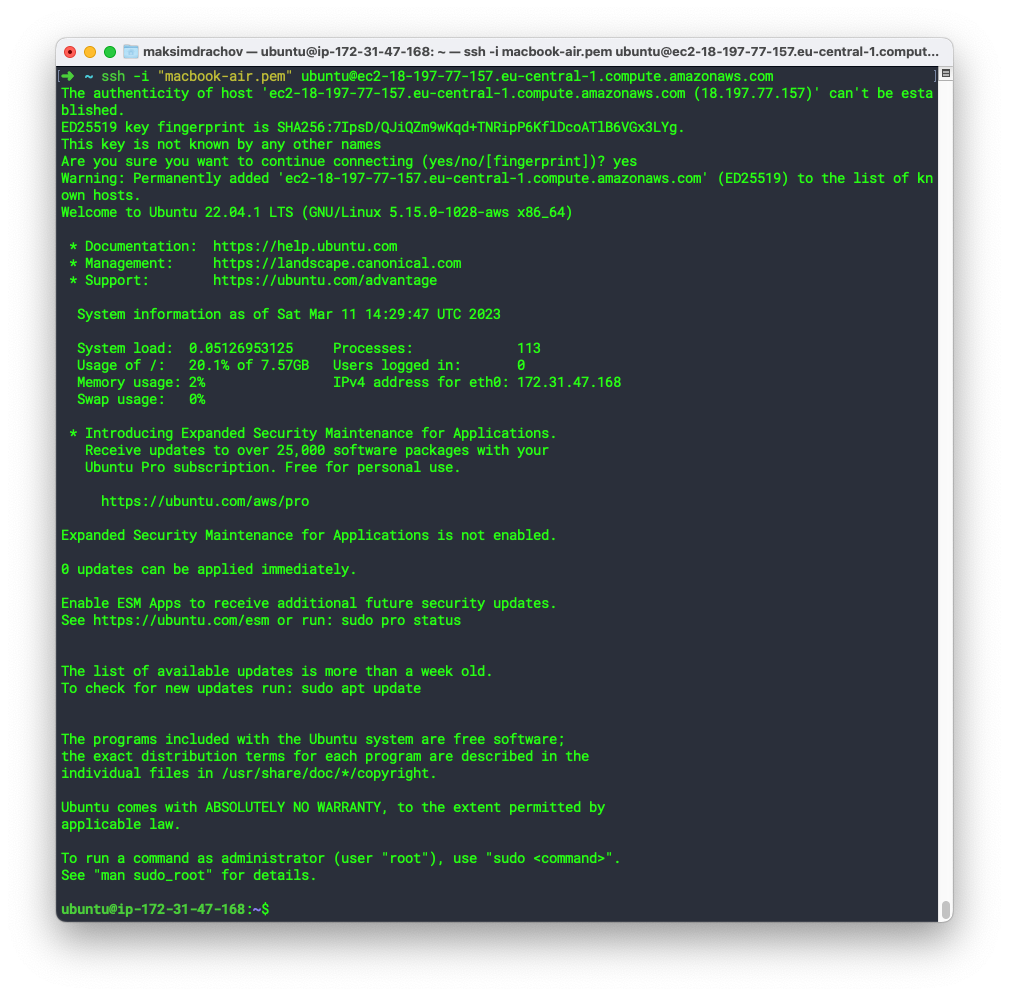
- Connect to instance using SSH client (using key pair)
Setup GitHub
- Generate SSH key
$ ssh-keygen -t ed25519 -C "your_email@example.com" - Add to agent
$ eval "$(ssh-agent -s)" $ ssh-add ~/.ssh/id_ed25519 - Add public key to GitHub settings:
cat ~/.ssh/id_ed25519.pub
2. Setup Ubuntu
- Install ncat, pip, nox
sudo apt-get update sudo apt-get -y install ncat sudo apt install python3-pip sudo apt install nox - On EC2 VMs, the following errors might appear:
To prevent this type of error:subprocess`.CalledProcessError: Command '('sudo', 'modprobe', 'vcan')' returned non-zero exit status 1.
(source)sudo apt-get install -y linux-modules-extra-$(uname -r)
3. Setup pycyphal
- Clone repo
git clone git@github.com:OpenCyphal/pycyphal.git cd ~/pycyphal git submodule update --init --recursive - Run nox (this will setup a virtual environment that can then be used for
pytest)nox --list # Lists all available sessions nox --session test-3.10 # Runs the tests in Python 3.10 # nox --session check_style # Runs black code style check - Setup (necessary for
pytest, recommended to save these commands in setup.sh to save some time!)export CYPHAL_PATH="/home/ubuntu/pycyphal/demo/custom_data_types:/home/ubuntu/pycyphal/demo/public_regulated_data_types" # EC2 default username is ubuntu, replace if relevant ($HOME causes issues with Vscode debug) export PYTHONASYNCIODEBUG=1 source .nox/test-3-10/bin/activate # source setup.sh # to save time - In another terminal window (leave open/running):
ncat --broker --listen -p 50905 - Pytest
pytest pycyphal/  # Runs all unittest/doctests in pycyphal folder (code)
pytest tests/     # Runs all unittests in tests folder
pytest tests/transport/udp -k _output_session  # Runs only unittest from tests/transport/udp, whose unittest name matches the given substring (-k option)
pytest tests/ --pdb # the --pdb option will stop execution upon failing a unittest and open a debug console
4. Setup Vscode
4.1 Remote Session
If you want to use Vscode, you’ll need to do the following steps:
- Install the Remote SSH extension
- Open Command Palette:
Remote SSH: Connect to HostConfigure SSH Hosts.../users/maksimdrachov/.ssh/config- Add the new host: (use ssh command copied from EC2)
- Open Command Palette:
Remote SSH: Connect to Host- Select added host
- Open pycyphal folder

4.2 Debug
- Install Python extension
- Open Command Palette:
Python: Configure Tests...pytestUse existing config file setup.cfg
- For pytest to work correctly
- Create file
.env-variableswith the following text:
(In my case username isCYPHAL_PATH="/home/ubuntu/pycyphal/demo/custom_data_types:/home/ubuntu/pycyphal/demo/public_regulated_data_types" PYTHONASYNCIODEBUG=1ubuntu, this might be different for you)- Edit
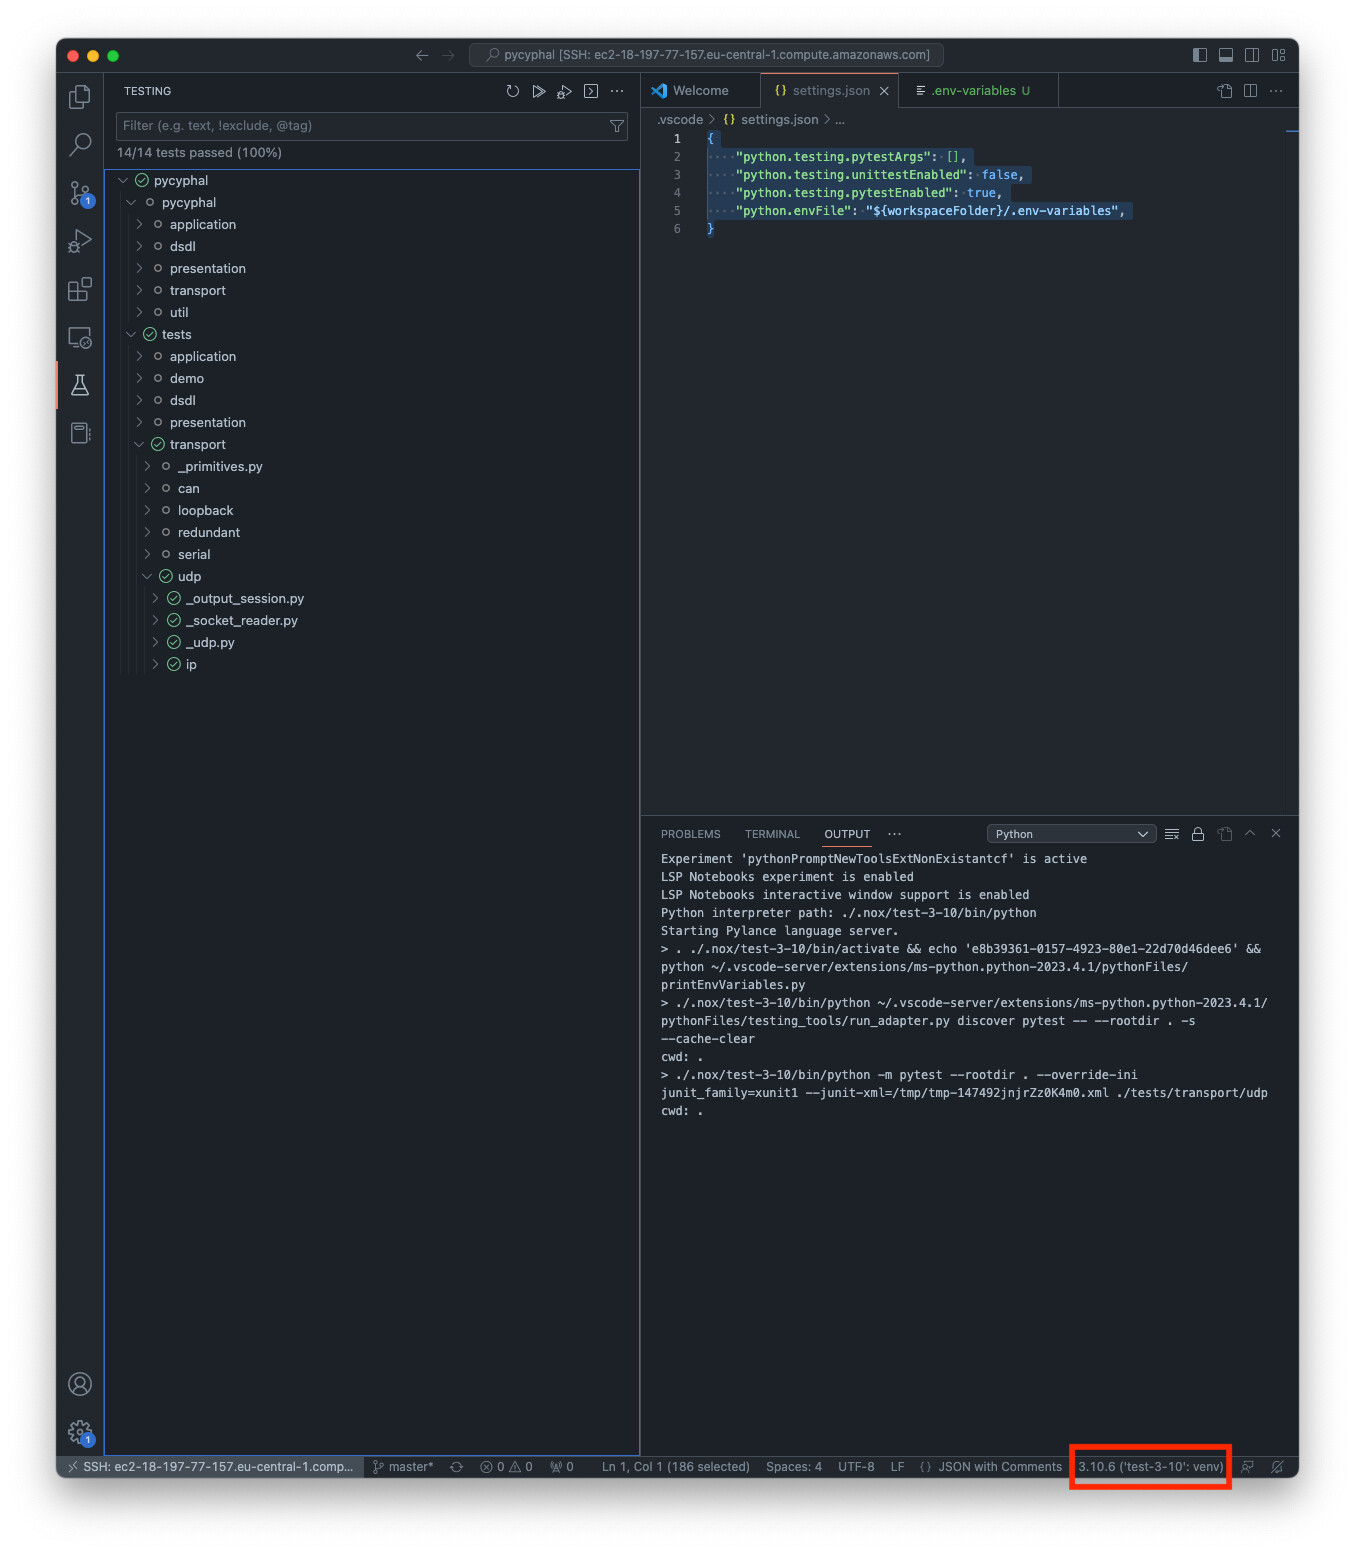
.vscode/settings.json:
{ "python.testing.pytestArgs": [], # This should already be in place after step 2 "python.testing.unittestEnabled": false, # and this "python.testing.pytestEnabled": true, # and this "python.envFile": "${workspaceFolder}/.env-variables", # but not this one } - Create file
- Restart Vscode window
Now you should be able to run unittests in Debug mode, place breakpoints,…
PS: In my case it is was put automatically, however make sure the Python interpreter from the nox session is used. If this isn’t the case:
- Open Command Palette
Python: Select InterpreterEnter interpreter path...- Enter path:
./.nox/test-3-10/bin/python
5. Finishing touches
To leave the code as clean as you found it, the following tools are part of CI and so should be consulted before wrapping up a MR.
5.1 Black: code formatting
Install:
sudo apt install black
To run:
cd ~/pycyphal
nox --session check_style
Let’s say you did something wrong, now you can fix it:
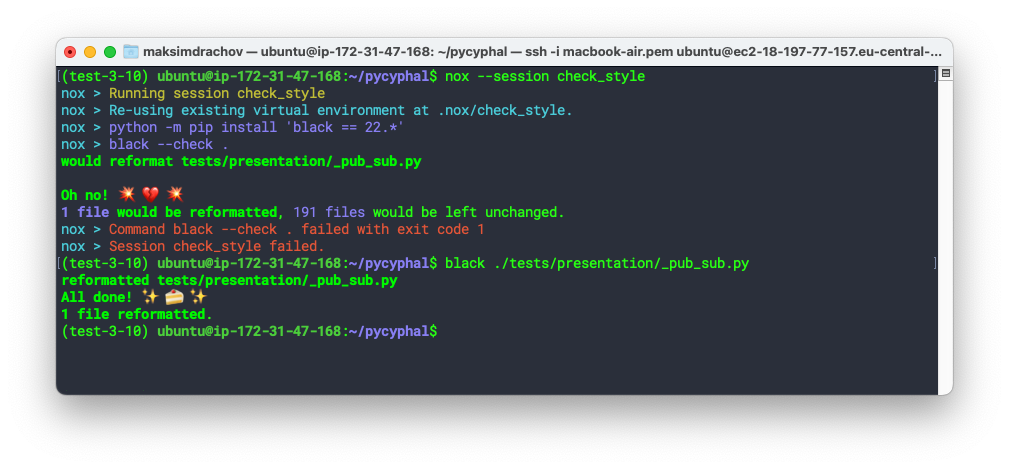
(or you could just install the Black Formatter extension)
5.2 Pylint: code analysis
Install:
sudo apt install pylint
For example, you’re working on the udp part, run this:
pylint --disable=import-error,line-too-long pycyphal/transport/udp
(import-error and line-too-long are covered by MyPy and Black)
5.3 MyPy: static typing
Install:
sudo apt install mypy
For example, you’re working on the udp part, run this:
mypy pycyphal/transport/udp | grep pycyphal/transport/udp
(There’s probably a more conscise command? @pavel.kirienko)