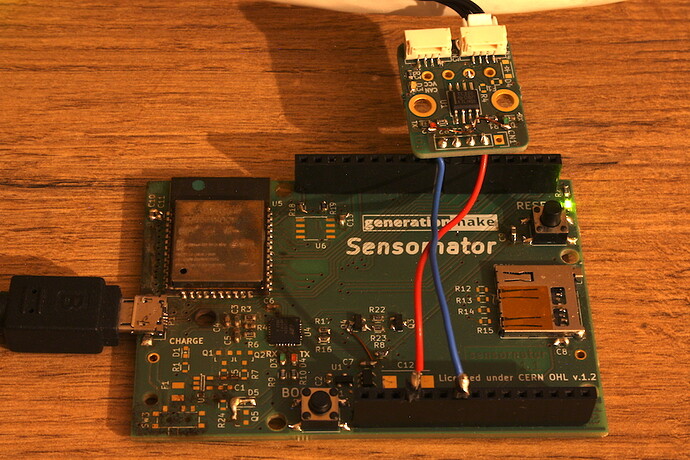
A couple of days ago the 107-Arduino-UAVCAN library was updated and now supports and compiles on the ESP32 microcontrollers.
So I decided to update my Blink example (posted here ) to work with the ESP32. The advantage of the ESP32 above most of the other Arduino boards is that it has an internal CAN controller. It only needs an external CAN transceiver. The transceiver is connected to IO12 and IO13, the led is connected to IO27.
This example also shows how to adopt the 107-Arduino-UAVCAN library to other CAN controllers and CAN libraries. This time I used the arduino-CAN library. To get the code working you only have to add the functions to send and receive CAN messages and get them into the libcanard frame format.
This is the code:
/*
 * This example creates a UAVCAN node. The builtin LED can be switched on and off using UAVCAN.
 * It also shows periodic transmission of a UAVCAN heartbeat message via CAN.
 *
 * switch built in LED on with
 *   yakut -i 'CAN(can.media.socketcan.SocketCANMedia("can0",8),59)' pub 1720.uavcan.primitive.scalar.Bit.1.0 'value: true'
 *
 * switch built in LED off with
 *   yakut -i 'CAN(can.media.socketcan.SocketCANMedia("can0",8),59)' pub 1720.uavcan.primitive.scalar.Bit.1.0 'value: false'
 *
 * Hardware:
 *   - Board with ESP32
 *   - CAN Transceiver SN65VHD232 or similar, RX=IO13, TX=IO12
 *   - Builtin LED connected to IO27
 *
 * Libraries
 *   - 107-Arduino-UAVCAN https://github.com/107-systems/107-Arduino-UAVCAN
 *   - CAN https://github.com/sandeepmistry/arduino-CAN
 */

/**************************************************************************************
 * INCLUDE
 **************************************************************************************/

#include <CAN.h>
#include <ArduinoUAVCAN.h>

/**************************************************************************************
 * CONSTANTS
 **************************************************************************************/

static CanardPortID const BIT_PORT_ID   = 1720U;

static int const LEDBUILTIN = 27;

/**************************************************************************************
 * FUNCTION DECLARATION
 **************************************************************************************/

bool transmitCanFrame   (CanardFrame const &);
void onBit_1_0_Received (CanardTransfer const &, ArduinoUAVCAN &);
void onReceive          (int);

/**************************************************************************************
 * GLOBAL VARIABLES
 **************************************************************************************/

ArduinoUAVCAN uavcan(17, transmitCanFrame);

Heartbeat_1_0 hb;

/**************************************************************************************
 * SETUP/LOOP
 **************************************************************************************/

void setup()
{
  Serial.begin(9600);
  while(!Serial) { }

  /* Setup LED and initialize */
  pinMode(LEDBUILTIN, OUTPUT);
  digitalWrite(LEDBUILTIN, LOW);

  /* Initialize CAN */
  CAN.setPins(13,12);

  /* start the CAN bus at 250 kbps */
  if (!CAN.begin(250E3)) {
    Serial.println("Starting CAN failed!");
    while (1);
  }
  /* register the receive callback */
  CAN.onReceive(onReceive);

  /* Configure initial heartbeat */
  hb.data.uptime = 0;
  hb = Heartbeat_1_0::Health::NOMINAL;
  hb = Heartbeat_1_0::Mode::INITIALIZATION;
  hb.data.vendor_specific_status_code = 0;

  /* Subscribe to the reception of Bit message. */
  uavcan.subscribe<Bit_1_0<BIT_PORT_ID>>(onBit_1_0_Received);
}

void loop()
{
  /* Update the heartbeat object */
  hb.data.uptime = millis() / 1000;
  hb = Heartbeat_1_0::Mode::OPERATIONAL;

  /* Publish the heartbeat once/second */
  static unsigned long prev = 0;
  unsigned long const now = millis();
  if(now - prev > 1000) {
    uavcan.publish(hb);
    prev = now;
  }

  /* Transmit all enqeued CAN frames */
  while(uavcan.transmitCanFrame()) { }
}

/**************************************************************************************
 * FUNCTION DEFINITION
 **************************************************************************************/

bool transmitCanFrame(CanardFrame const & frame)
{
  CAN.beginExtendedPacket(frame.extended_can_id);
  for(int i=0; i<frame.payload_size; i++)
  {
    const uint8_t *candata=(const uint8_t *)frame.payload;
    CAN.write(candata[i]);
  }
  CAN.endPacket();
  return true;
}

void onReceive(int packetSize)  // received a packet
{
  if (!CAN.packetRtr())   // non-RTR packets
  {
    if(packetSize>8) packetSize=8;
    static uint8_t data[8];
    for(int i=0; i<packetSize; i++)
    {
      if (CAN.available()) data[i]=CAN.read();
    }

    CanardFrame const frame  /* create libcanard frame */
    {
      0,                   /* timestamp_usec  */
      CAN.packetId(),      /* extended_can_id limited to 29 bit */
      packetSize,          /* payload_size    */
      (const void *)(data) /* payload         */
    };
    uavcan.onCanFrameReceived(frame);
  }
}

void onBit_1_0_Received(CanardTransfer const & transfer, ArduinoUAVCAN & /* uavcan */)
{
  Bit_1_0<BIT_PORT_ID> const uavcan_led = Bit_1_0<BIT_PORT_ID>::deserialize(transfer);

  if(uavcan_led.data.value)
  {
    digitalWrite(LEDBUILTIN, HIGH);
    Serial.println("Received Bit: true");
  }
  else
  {
    digitalWrite(LEDBUILTIN, LOW);
    Serial.println("Received Bit: false");
  }
}
As in the previous example the LED can be switched using yakut:
This time I used a different Node-ID (17) and a different Subject-ID (1720).
Turn the LED on with:
yakut -i 'CAN(can.media.socketcan.SocketCANMedia("can0",8),59)' pub 1720.uavcan.primitive.scalar.Bit.1.0 'value: true'
Turn the LED off with:
yakut -i 'CAN(can.media.socketcan.SocketCANMedia("can0",8),59)' pub 1720.uavcan.primitive.scalar.Bit.1.0 'value: false'
This is a picture of my setup:
For the CAN transceiver and dronecode connector I used this board
